I seriously laugh out loud every time I read this! Maybe I will try it! Happy Friday y'all!
Friday, July 11, 2014
Thursday, July 10, 2014
I like 'em Sunny Side Up...
I really love flowers. I love gardening and growing things. I love looking out my studio window and seeing blooms. One of my favorite flowers, besides tulips and peonies, are daisies. Just simple white daisies. I know, they are cheap, but there is something so sweet and innocent about them.
I was thinking about them the other day as I started this canvas in my studio and although I didn't quite create a daisy, I was inspired by the simplicity of the white and yellow blooms.
I wanted a simple painting but with a lot of texture. The entire bottom half of this painting is collage of book paper.
I kept my palette simple ~ blue, gray, brown and yellow. I used Golden molding paste to create flowers that popped off the canvas. It is important not to use "light" molding paste for this kind of piece or joint compound (which is water soluble and will dissolve with paint on top). I used a charcoal pencil for definition.
Can you see the texture?
My flowers kind of look like flying eggs, sunny side up. I think it works any way ~ a little funky, fun and elegant!
Be sure to check out all my free tutorials on my blog page above marked ART TUTORIALS,
or visit me on my website at Kirsten Reed Designs.
Here are the supplies I used for this piece:
Golden Fluid Acrylic Paints
Tuesday, July 8, 2014
Slow & Steady
My sweet friend Kim and I affectionately call ourselves the Turtles. We have run several races together and well, to use the word "race" and "Kirsten and Kim" in the same sentence is quite comical!
We are SLLLLOOOOWWWW! Crazy slow.
In fact, my husband often jokes that I could walk faster than I run. And little known fact, I do walk very fast...no matter where I go. I think I have just one speed. And if you call that speed 'walking' ~ it's fast. If you call the speed 'running' ~ it's slow.
I have known Kim for about 20 years. Over the past several, we have given each other little turtle things ~ turtle earrings, bracelets, etc. One year she got socks with turtles on them and we wore them during the Nashville Half-Marathon....and some lady asked if we were turtles.
I excitedly said, "Why, yes, we are!!" She then asked me, "What's the phrase?" I looked at her a little confused and said, "Turtle Power!" It was the only thing I could think of. She immediately dismissed me and said, "you're not a real turtle!"
I kid you not! We laughed at least another three miles about her elitist little "secret turtle club"!!
Kim and I met while working together at Sandestin Resort in Florida many moons ago and I am so blessed to still call her friend. Lucky girl she still gets to live there, so on her birthday this year, I made her a little sea turtle to represent our slow running and our steady friendship!
I even wrote underneath the final canvas, as I often do, little messages to her. This one says "slow and steady wins the race".
So in honor of my friend who happily "races" with me at my pace....Turtle power!
Monday, July 7, 2014
Come see me at Swanky Plank!
You are cordially invited to come out to the historic Rippavilla Plantation in Spring Hill, TN and visit the fun, vintage and artsy marketplace call Swanky Plank. There will be lots of artisans and vendors including me!
This weekend's schedule is:
Thursday, July 10 - Sneak Peek Party 4-8 pm
Friday & Saturday, July 11-12 9-6
Admission is $7
Here is a peek at some of the goodies I will have for sale!
Hope to see you there!
Friday, June 27, 2014
Monday, June 23, 2014
Orly Avineri Blog Hop
Welcome to the Orly Avineri Blog Hop with StencilGirl Products! Orly has designed a new line of stencils available through StencilGirl beginning today! :)
For my project, I started with a background of deli papers, paint, and napkins.
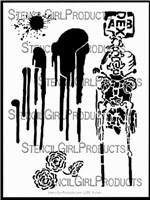
I began making marks and using stencils. The one below is Orly Avineri's Splats, Blooms, and Bones stencil.
I used Heidi Swapp's Color Shine spray in mustard and blocked off the edges so only the stencil would have spray.
I continued adding color and drips and marks and layers of stencils.
I finally decided to turn the board this way and began my composition. Since I have been struggling with Balance in my life, this became the theme of my piece.
I used Carolyn Dube's Uplifting Words stencil to stencil my word, borrowing letters from the other words to spell the word I wanted...BALANCE. I used a hefty amount of molding paste so the letters would pop off the canvas.
Using Orly's stencil again, I repeated the theme of flowers from my background with floral portion of her stencil. I gave my piece dimension by scraping Golden Molding Paste through it.
More Close Ups
Using some mesh from my stash to add texture and molding paste with Orly's stencil:Using Carolyn Dube's Jumbo Vintage Type Letters stencils...
If you enjoyed this tutorial, be sure to check my other free tutorials on my website at
Kirsten Reed Designs or just follow me on Bloglovin' and get them delivered to your inbox!
***STENCILGIRL GIVEAWAY***
Make sure you leave a comment because EVERY comment on EVERY blog is an entry to win FREE stencils on StencilGirl Talk!
Five Lucky Winners will be chosen to win one of Orly's new stencils.
Giveaway will close Sunday, June 29, 2014 at 11:59 pm CST. Remember to keep hopping along with those artists listed below and the more comments you make the more entries!
Good Luck!
Blog Hop Order
Kirsten Reed You are HERE
Gwen Lafleur Go here next!
Friday, June 20, 2014
Fly Away with Me, StencilGirl & Craft Hoarders Anonymous Challenge #10!
Come join me as I use my stash & a challenge to create a new piece of art!
You don't have to ask me twice to get messy when it comes to art, so when I read Challenge #10 from Craft Hoarders Anonymous Challenge Blog ~ I was scrambling to pull out supplies and make a lovely artsy mess!
Challenge #10 Spray It! Ink It! Paint It! Smear It! Emboss It!
Show us your inner mixed media diva! Use spray mists, inks, paints, modeling paste, embossing powder, pastels, chalk, and whatever messy media you can find! Let's dig into that hoard, pull out some of that "messy stuff," and use it up! There is a mess-maker hiding in all of you! Let her/him out to play!
I started with a canvas I have in my pile of canvases with backgrounds but nothing else on them. I call it my Lonely Tribe of Backgrounds - there are quite a few! This one in particular I had created this amazing background with Golden Fluid Acrylic paints and glazing medium. I allowed it dry for 24 hours and got this scrumptious background.
Here is a close up.
I began by layering different stencils with some paint to try and "unstick" my mind. I had no plan at this point. I love using lots of different stencils for texture and helping me free my creativity. Read at the end of my post for the StencilGirl stencils I used. I know, I know "Holy Stencil Hoarding!" :)
I started with the Queen Anne Lace stencil, only using the top part. This made my background remind me of the sea and the "lace" looked like coral to me.
I used some of the stencils with Heidi Swapp Color Shine sprays in various colors. I love these iridescent sprays because they are waterproof and oh so shimmery!
Look at that shimmer! Yum...
I started seeing an underwater picture and sketched out some fish. But then I got majorly stuck. I didn't want to cover anything but it was too chaotic to leave it like it was...so I went a completely different route.
I scrapped the underwater scene because there was so much of the background I loved that I would lose by having to 'paint out' with water. I decided to sketch out a butterfly with my stabilo pencil in black. These pencils are great because they erase with a little spritz of water and wipe with a paper towel.
I used wood icing for texture with Carolyn Dube's Uplifting Words stencil and Nathalie Kalbach's What's the Point? stencil.
I began painting around the butterfly with titanium white to bring it out and separate it from the background. I allowed lots of drippage because I think drips are gorgeous!
I continued with layers of color using splashes of Dr. Ph. Martin's Bombay India inks and Daler Rowney India inks~ my favorite is the light green (it should be called lime green)! I also used lemon yellow, flame orange, teal and flame red.
To add detailing to the butterfly, I began doodling on top of it with my white Fine Point Sharpie. I continued to add other India inks for more color and depth around the wood icing.
Here are some close-ups of the butterfly.

And here is a photo of the final 24x24 canvas.
My butterfly is escaping a chaotic world and pursuing everything she believes in!
Hope you enjoying "flying" along with me today!
For more art tutorials, click my page above or you can make sure you don't miss a post and follow me on Bloglovin and Kirsten Reed Designs on Facebook.
Leave me a comment to be entered in the GIVEAWAY!
StencilGirl Products will be picking FIVE winners this week--one from each day!
Visit each blog and leave a comment.
The more blogs you comment on, the more chances you have to WIN!
One comment per blog please.
You will have until Sunday, June 22nd at 11:59PM Central Time to leave your comments. The winners will be announced on the StencilGirl Facebook on Tuesday, June 24th.
Supplies Other than Stencils Used In This Piece:
Subscribe to:
Posts (Atom)